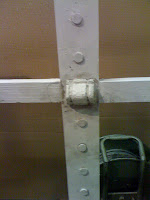
Before we actually started painting in the details and the correct colours we have to layer up on idenem. This was to protect the polystyrene and to also make the piece not look like it was made from polystyrene.
Because there was so many layers to the idenem, the piece had to dry over night and perhaps a day with the amount that needed to dry!
This image shows the first colours that we put onto the window, after a few more layers of paint to lighten it we decided to have a look at the real thing outside in the day light. Thankfully we quickly realised that the colours that had been printed out didn't do justice to the real thing. The printed image came out a lot darken than the real thing, also the lighting in the theatre space was not brilliant and hindered the appearance of the colours.an darkened the image.
Later on our work became more recognizable to the real thing. Dry brushing allowed us to create the highlights needed and the mortar lines gave a better overall appearance to the entire piece. Using shadow and highlights we made the window more defined.
The only thing left to do was to give it a bit more context and historical reference...


No comments:
Post a Comment